
Trying to wire a ballast up with fewer terminals than the existing one? It can look confusing but it really isn’t too bad when you know how… use our downloadable cheat sheet!
Manufacturers of fluorescent high frequency ballasts are constantly looking for new ways making their ballasts more compact. One way of doing this is to reduce the number of terminals. Ballasts which ran two fluorescent lamps were traditionally often 8 terminals. Most are now six terminals.
If you come across an eight terminal ballast that needs rewiring to six wire, it is not as confusing as it may seem. By looking at the wiring diagram on the top of both ballasts, you can usually easily work out how to adapt the wiring to suit.
Take a look at the example below:
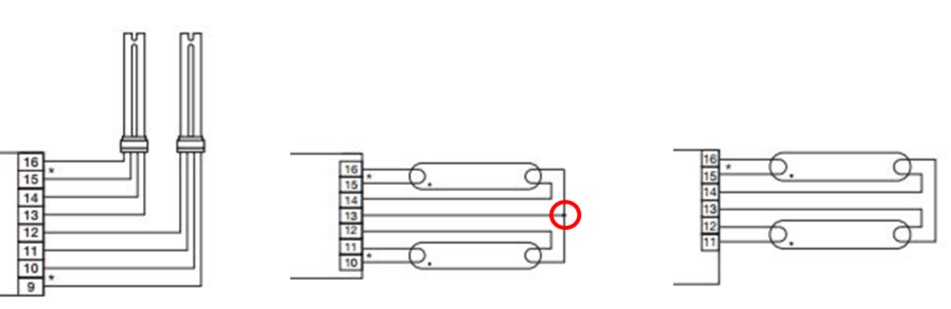
Above are three generic examples of an 8 terminal, 7 terminal and 6 terminal ballast. The way to work out how to wire it is to trace the pairs of cables from the lamps back to the ballast translate them to the same pair on the new ballast.
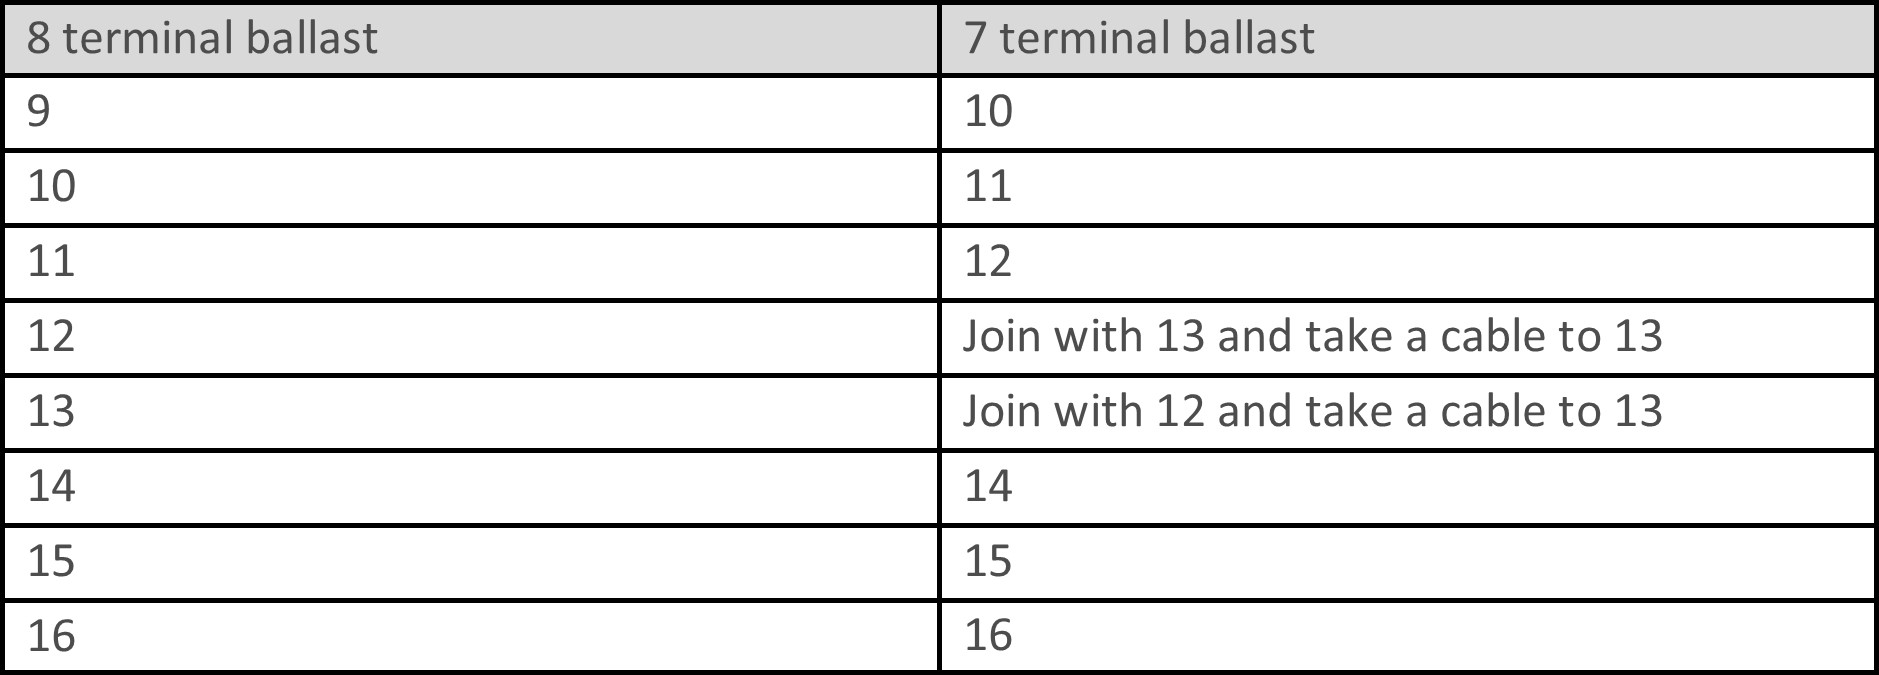
Taking from 8 to 7 terminal
First pair on the 8 terminal is 9 & 10. These translate directly to 10 & 11.
Second pair on the 8 terminal is 11 & 12. The same pair on the 7 terminal is 12 & 13. Please note, terminal 13 takes two cables (note the join in the red circle).
Third pair on the 8 terminal is 13 & 14. The same pair on the 7 terminal is 13 & 14. Again, noting that terminal 13 takes two cables.
Fourth pair on the 8 terminal is 15 & 16. The same pair on 7 terminal is 15 & 16.
The result therefore is when wiring this 8 terminal ballast to this 7 terminal ballast:
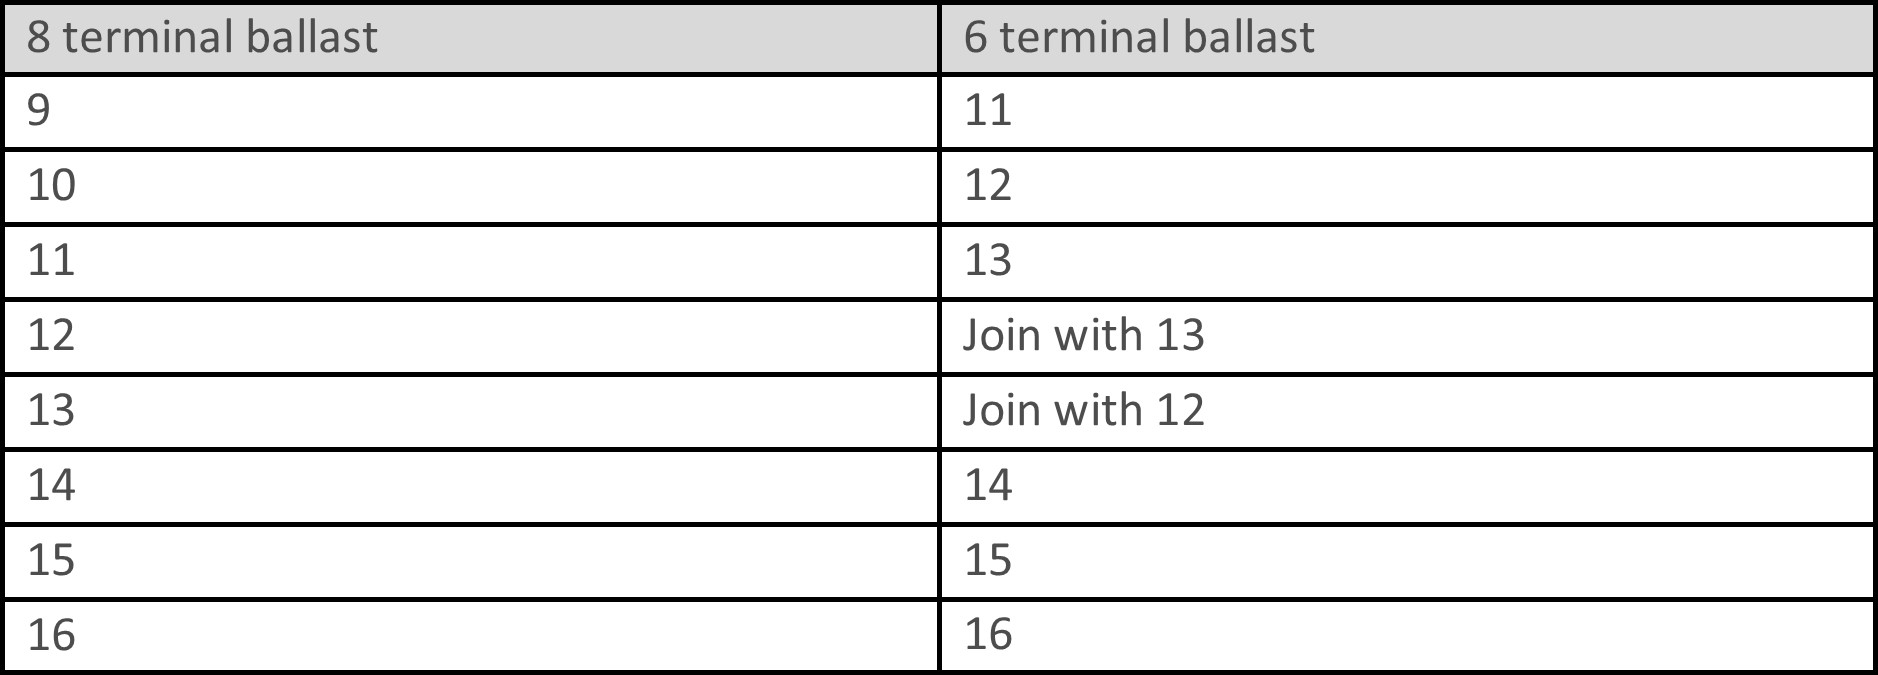
Taking from 8 to 6 terminal
First pair on the 8 terminal is 9 & 10. These translate directly to 11 & 12.
Second pair on the 8 terminal is 11 & 12. The same pair on the 6 terminal is 13 & no terminal. Note that the other cable goes directly to the lampholder on the other lamp.
Third pair on the 8 terminal is 13 & 14. The same pair on the 6 terminal is no terminal & 14. Again, noting that the other cable goes directly to the lampholder on the other lamp.
Fourth pair on the 8 terminal is 15 & 16. The same pair on 6 terminal is 15 & 16.
The result therefore is when wiring this 8 terminal ballast to this 6 terminal ballast:
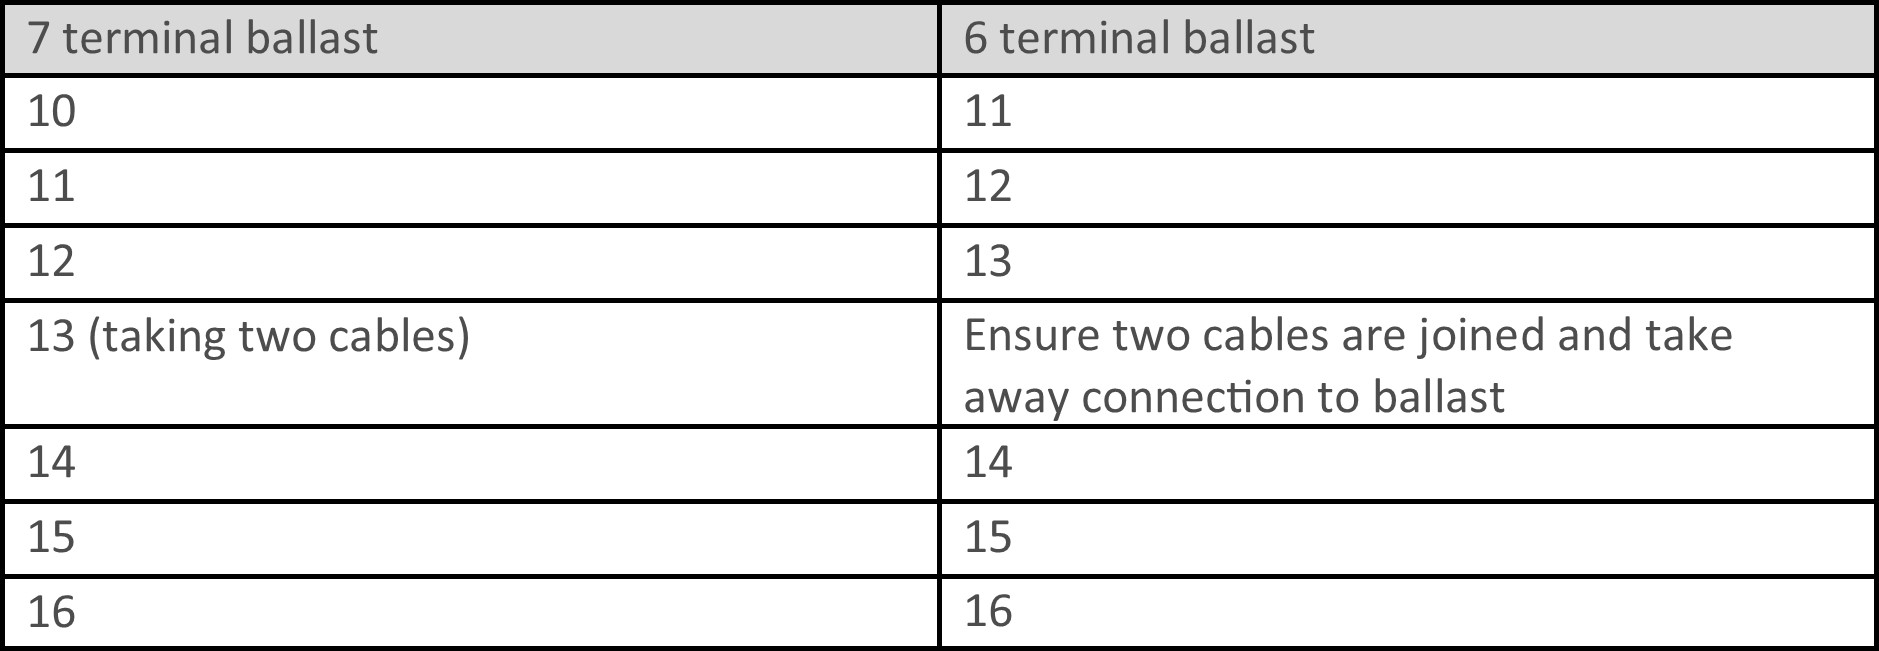
Taking from 7 to 6 terminal
First pair on the 7 terminal is 10 & 11. These translate directly to 11 & 12.
Second pair on the 8 terminal is 12 & 13 (which will be taking cables from two lampholders). The same pair on the 6 terminal is 13 & no terminal. Note that the other cable goes directly to the lampholder on the other lamp.
Third pair on the 7 terminal is 13 (which will be taking cables from two lampholders) & 14. The same pair on the 6 terminal is no terminal & 14. Again, noting that the other cable goes directly to the lampholder on the other lamp.
Fourth pair on the 7 terminal is 15 & 16. The same pair on 6 terminal is 15 & 16.
The result therefore is when wiring this 7 terminal ballast to this 6 terminal ballast:
Ballast configurations vary between manufacturers, but by tracing the pairs on the wiring diagrams, you should always be able work out how to wire them correctly.
Of course, if you are struggling, our mission is to make your life easier and you should always feel free to call us on 0151 480 4000, whether a customer or not!
Download this cheat sheet below!
RLT Onsite is trading division of RLT Group Global Ltd
Copyright © RLT Onsite 2026. All rights reserved. Website by:


